It can be pretty daunting for beginners to create an e-commerce website. To run an online business successfully, there is nothing better than an e-commerce site to boost your business. Touchwood, WooCommerce is there to take all the responsibility and ability to meet all the requirements.
WooCommerce is a WordPress plugin that makes it easy to set up and maintain an online store without hustling about coding.
Thankfully, WooCommerce is simple to use. Even if you don’t consider yourself tech-savvy, you can easily integrate your online business with the WordPress site. Due to its flexibility and user-friendliness
In this article, we are going to break the ice and clear the basic facts of the WooCommerce plugin. Before diving into the technical stuff let’s find out what is WooCommerce and the reasons behind using it.
What is WooCommerce?
WooCommerce is a reliable and strong WordPress platform to build an e-commerce site for an online business. With more than five million installations and 4.5-star ratings. It is the most popular e-commerce plugin to support any small or large business.
On top of that, Woocommerce is open-source free software, incredibly flexible, and provides countless customizable options to extend your business. However, there are also tons of amazing plugins and extensions available to add effective features to your WooCommerce store. So you can utilize them to enhance its capabilities and expand your store. Let’s take a stroll the WooCommerce usability.
- Sell goods and services, such as affiliate items and digital downloads.
- Add functionality and features to the shopping cart
- Build membership websites
- Track order and shipment processes.
- Automate estimates for sales and taxes.
- Provide safe online payments from multiple payment gateways.
- Numerous add-ons are available to customize the online business.
Simultaneously, it indulges your WordPress e-commerce site with a bunch of extraordinary features. That makes easier the process of selling and fulfilling the orders successful.
From shipping the products to tracking orders and reporting deliveries, Woocommerce simplifies all the procedures smoothly and effectively. Undoubtedly, it is a perfect e-commerce solution for your WordPress site.
Why Use WooCommerce for Online Business?
If you have never experienced managing any online business before, you might be concerned about the technical aspects of operating your WooCommerce site. As you are a beginner, It’s important to know about the facts. Before starting to use the WooCommerce plugin. So, let’s explore how WooCommerce is satisfying the requirements of online stores.
Multiple Payment Methods
WooCommerce has many built-in options for payment gateways. It comes with by default support to select stripe that accepts all top credit and debit cards. In addition, Apple Pay, Google Pay, and Alipay are payment options for clients.
However, you can leverage dozens of payment gateways by choosing add-ons, including Authorize.net, bank transfers, Amazon Payments, and more.
Flexible to Design
The WooCommerce plugin is quick and easy to personalize. It fits in any WordPress theme. You will also be able to choose the best kind of designs and themes for your site. Many of the themes may come for free. You will have full control over how you want to shape your E-commerce site.
Easy to Customize
WooCommerce is highly adaptable and scalable as it works with WooThemes as well as any WordPress theme. This generates numerous shortcodes and widgets which enable tons of possibilities to customize the WordPress site easily. Additionally, it has the REST API for third party-service integration.
Safety-Check
Over 22% internet is run by the WooCommerce Platform. This is the most trustworthy platform. Because of its rapid action in fixing security bugs and constant security updates.
Pre-requisites to Integrate WooCommerce
Since you observe the basics of the WooCommerce plugin. Now, we will walk you through some technical stuff. Before getting into this, you have to make sure certain things about your WordPress site. If you are integrating WooCommerce into an existing WordPress site then you are all set to configure your E-commerce site.
However, starting from scratch with an e-commerce website. You must buy hosting first, register a domain, and configure your WordPress installation.
Moreover, we also advise getting an SSL certificate. So you can accept safe online payments. This will help your business to develop in a long run.
Get Started with Woocommerce (In 4 Steps)
As we have been through all the prerequisites. Now it’s time to get started with the setup of the WooCommerce Plugin in just four steps.
Step#1- Install WooCommerce Plugin and Configure the Settings
Initially, install and activate the WooCommerce plugin just like any other WordPress plugin. It is available for download from the WordPress Plugin Directory. And after downloading it, you can upload it in your admin dashboard by clicking Plugins > Add New > Upload Plugin.
There is another way you may try whichever you feel is easy to do. Browse WooCommerce in the Plugins dashboard, then select Install Now and Activate. The installation wizard will appear once you’ve activated the WooCommerce plugin.
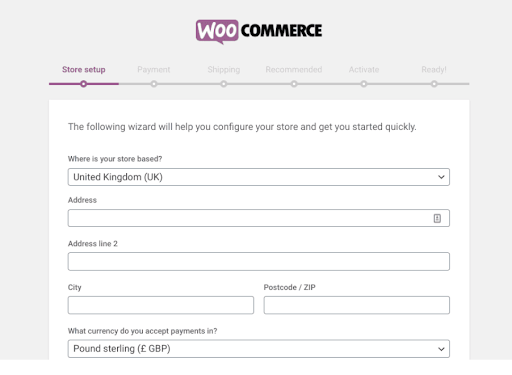
From here, you will fill up all the required information to set up a WooCommerce store. Along with the physical location of the store, this also lists the acceptable forms of payment.
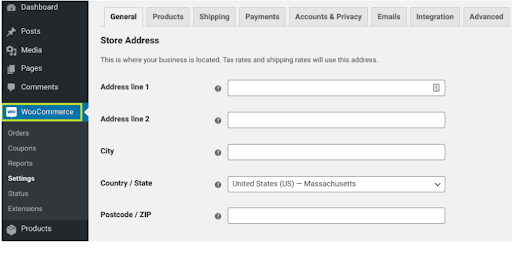
There is always a backup option to manually change the settings from the WordPress dashboard (WooCommerce > Settings).
Get back to the track, after entering store location information, and click the continue button at the bottom. Once you clicked, it will direct you to the payment page, and further shipping. Complete the forms and adjust the settings as necessary.
The setup wizard’s fourth screen will list proposed extensions. For the time being, we advise removing each of these. Later, you can go back and add only those that are relevant to your website.
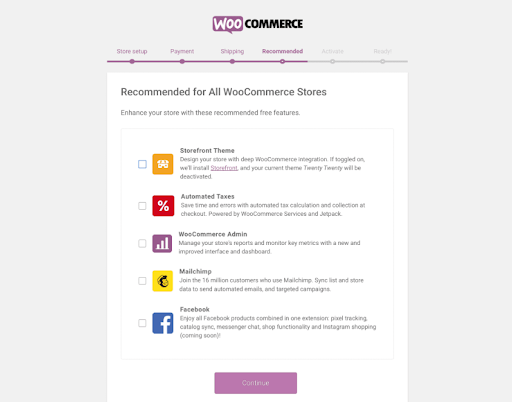
Additionally, it will prompt you to log in to and download the Jetpack plugin. Once more, you can avoid this step.
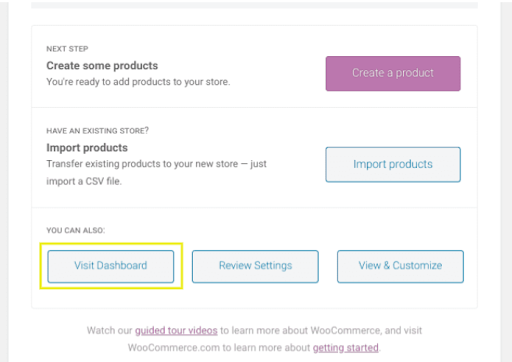
To create new products, visit the dashboard and modify settings. You’ll see the WooCommerce item has been added to the admin area if you go to your WordPress dashboard.
Step#2- Add Products to Woocommerce Store
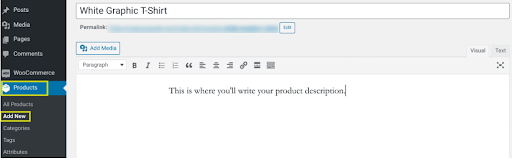
Since you have installed the wizard setup, let’s try to add a product to your WooCommerce store. First, in the WordPress dashboard navigate to Products > Add New. After coming to the page, put an attractive title for the product and write down a short eye-catchy description.
You can add product categories and tags on the right side of the page. These make it simpler for your customers to navigate through your selection and find what they need.
Since you have installed the wizard setup, let’s try to add a product to your WooCommerce store. First, in the WordPress dashboard navigate to Products > Add New. After coming to the page, put an attractive title for the product and write down a short eye-catchy description.
1. Product category and Pricing
According to the product’s type, you can set a listing price and also provide an option to add a sale price. Furthermore, WooCommerce enables you to utilize this section to create and display a sale price for deals with deadlines.
2. Inventory
You have to customize the settings for tracking your inventory. You may activate notifications for low or out-of-stock items here as well.
3. Shipping
You can enter the weight, size, and class of the product to provide the necessary information.
You can also include a product image, similar to the featured image on WordPress posts. You can use the Product gallery option to upload more pictures.
Last but not the least, remember to review your product information. When everything is to your satisfaction, press the Publish button in the top right corner of the website. Every time you want to add a new product to your store, you can repeat this process.
Step#3- Choose the Right Theme for the Woocommerce Store
The first step to choosing the right theme is determining what you want from it. For instance, do you want it to be aesthetic? Or custom friendly or responsive.
Once you have laid out what exactly you want for your WooCommerce online store. You can take the first steps to shortlist potential options. After all, there’s no point in looking at WordPress themes before you’ve determined what yours must offer.
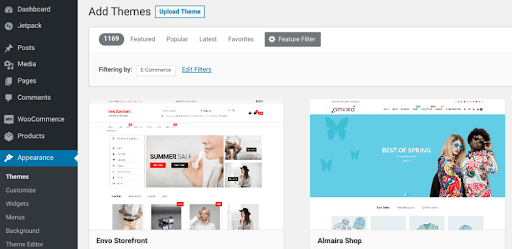
We suggest you pick one out of numerous themes and templates made for an e-commerce site. To get started, browse the WooCommerce Theme Store for a theme that satisfies your requirements. Also, filter out it by mentioning some keywords of features.

If you find the suitable theme you wished, choose the Add To Cart option, then carry out the checkout procedure. Download it on the order confirmation page. Going to Appearance > Themes > Add New > Upload Theme will allow you to upload the file to your WordPress website.
After uploading the theme click the install button followed by activate. Here are other tips for you to have the best theme. First preview it with your WooCommerce product so that you can visualize the site. And how your store would appear from the front end of your site.

However, it’s better to keep your theme simple when choosing one. Your e-commerce pages should increase conversions. Therefore, you want as little design clutter and distraction as possible to focus customers’ attention on the products themselves.
Step#4- Choose the Relevant Extensions
As this article is about WooCommerce for beginners, choosing a specific extension will be an advantage for novices. You can even use it to add vital features and functions to your online store within just a few clicks.
Let’s see the extensions that can offer:
- Dealing with abandoned shopping carts
- Offer multiple prices and discount offers
- Add sophisticated product filtering
- Publish landing pages to market products.
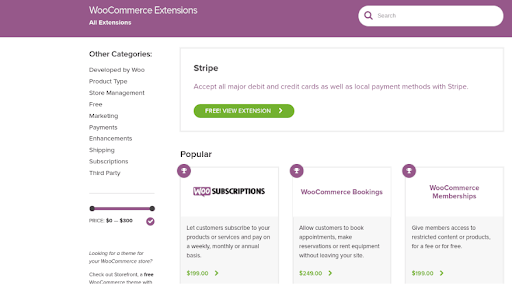
You can enjoy both free and premium versions which you can find through the WooComerce Extension Store.
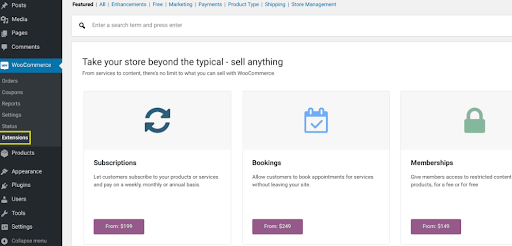
Additionally, you may perform this action straight from your WordPress dashboard by navigating WooCommerce > Extensions.
Before searching for extensions, connect your WordPress site with your WooCommerce account. Clicking the Connect button on the WooCommerce.com Subscriptions tab will establish the connection.
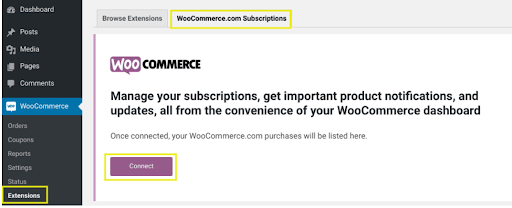
You must approve the access on the following page. Click the Approve button to complete the action.
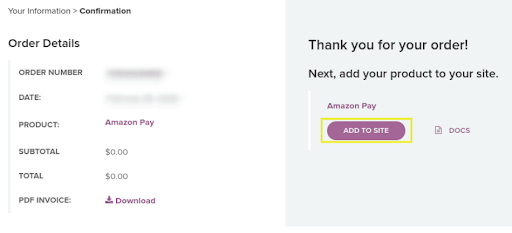
Once you create the connection, without any delay you can start searching extensions by term. Or you can use the navigation bar at the top to filter by sorts. Let’s assume you wish to add a free one, like the Amazon Pay extension.
Click on it and you’ll be directed to the WooCommerce Marketplace extension information page. Select “Install Now – Free” from the menu. Next, you will be taken to the checkout page. After clicking Continue, fill in your details and press Purchase to finish the order. Press the “Add to site” Button on the order confirmation window.

Like any other WordPress plugin, you can manually upload the extension. Go to your WordPress dashboard and click Plugins > Add New > Upload Plugin.
The steps are simple, quick, and easy for the newbies to learn. Have a focus and be eager to learn new things. We are here to bring you the special WooCommerce for Beginners article.
How to Manage the WooCommerce Orders: (Tracking and Managing)
Finally, we have conducted setting up the e-commerce site following the 4 simple steps. Now the site is ready to roll and customers also can start placing orders. In that case, it’s a must to have a specific procedure to manage and track the orders. Fortunately, WooCommerce can help streamline and simplify another part of online selling.
You can view the order’s progress and specifics using a function provided by the WooCommerce plugin. Navigate to WooCommerce > Orders.
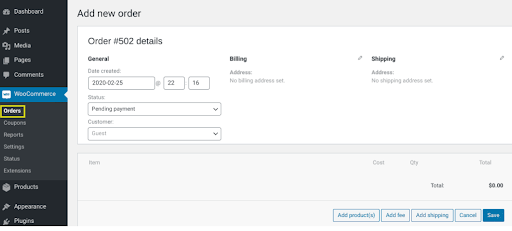
You can check the progress of orders here once they’ve been placed (pending payment, refunded, etc.). You may also send order emails from here and make changes to your payment and shipping information.
The WooCommerce Reports are another great resource that is worth mentioning. It is located in WooCommerce > Reports.
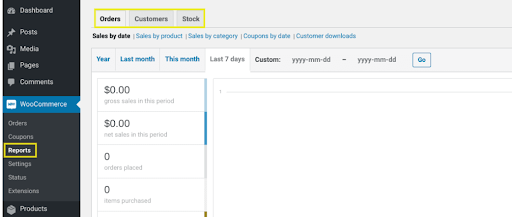
Here, you can get all the detailed records of the online store. You can also view the gross and net revenues for the most recent week or different periods. There is also room for other information.
- Delivered Orders
- Items Collected
- Refunds Complications
- Product Supply
- Taxation and Sales
You can leverage this evidence to boost the performance of your online store and refine your selling tactics. Additionally, you can extract the reports in CSV format for seamless integration with your records.
These are but a few of the features that WooCommerce has built-in that can make tracking and managing your orders relatively simple. Using plugins and extensions will enable you to go even further.
Payment Gateways Supported by WooCommerce
WooCommerce supports the major payment gateways also a few that might not even be useful. Following are some of the accepted payment methods:
- PayPal (Built-in)
- Stripe (Built-in)
- Amazon Pay
- Authorize.net
- PayFast
- FirstData
Moreover, WooCommerce also eagles other in-person payments via Square or PayPal. You can get all the updated lists from the official WooCommerce website WooCommerce payment options.
Final Words
Building an e-commerce site may seem difficult and expensive. But if you find out the magic about digital platforms that share tons of options and exciting features for free. You can able to run an online business without worrying about finance and any physical hassle.
With this article, we have added all the primitive steps and topics since this is all about WooCommerce for beginners. Starting from scratch to all possible ways you can develop your online business through WooCommerce has been thoroughly described.
Ideally, this article has given the basic ideas to start an e-commerce site on your own. There could be advanced methods that might be important to implement. But keep calm and trust the process. One by one you can learn better.

