Are you thinking of customizing a password-protected page in WordPress? WordPress has an easy option to hide any page by a specific method. Implementing the password-protected method, the hidden page in WordPress will only be visible to the user who has the password.
In this article, we will learn how to customize a password-protected page in WordPress. In terms of creating custom-protected pages, you can maintain brand consistency across the whole WordPress website. You can advertise other pages in this area as well.
Why Do You Need to Customize Password-Protected Pages in WordPress?
There could be many reasons to customize a password-protected page in WordPress. Let’s explore the reasons.
Lack of content
The page not having proper content can be a good reason for customizing it to a password-protected page. It can decrease the rank of search engines. Moreover, failing to have the expected content can confuse the user and viewer at the same time. This way the SEO rank can fall. Once it fails, then it will be very difficult to rank again.
Not Every Page is Beneficial
Every page is not for the user. Some of the pages might need privacy for the enhancement of the WordPress site. To accomplish this reason, you need to customize and hide the pages in WordPress. It also helps to acquire the SEO rank. Therefore, this will be easily visible to the viewer.
Need only specific people to see the page
There is another necessary reason for customizing the page to be password-protected on the website. You may need to preserve the authenticity of the website’s information. There can be much private information that only should be accessible to the authorized person. For that, you may need to hide the page on the website. This will protect private information and certify the WordPress website’s quality.
The page might not be ready
While developing any WordPress site, the page is not properly ready to publish. In that case, you can try the password-protected method to the page from your WordPress website. This may help to do the work without any confusion. Sometimes, you may forget to update the content of a page or post. So if you hide the page it will perform better.
If you want a private page
There is very essential information about the clients or a particular product you want to keep private. This can be a logical reason for customizing pages to be password-protected in WordPress. On that page, you can have confidential comments or conversations.
How to Enable a WordPress Password-Protected Page
Since we know the possible reasons why we should customize a password-protected page in WordPress. Now, it’s time to learn how to enable a WordPress password-protected Page. So, let’s get started.
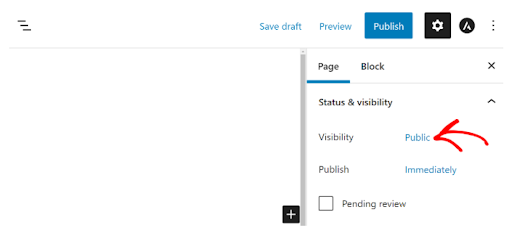
First, you must edit the chosen page to implement the password-protected method. Then click the visibility feature to activate the method.
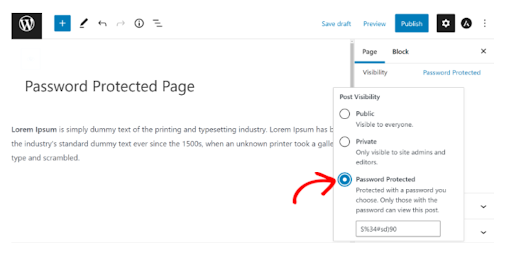
Simply choose the password-protected method and put a password for your page.
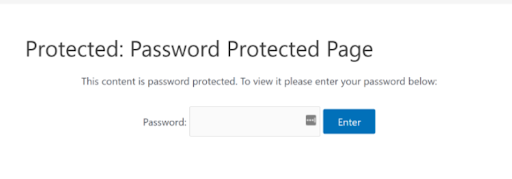
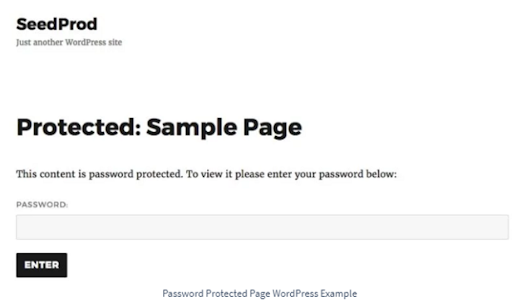
Once you click “Update” or “Publish,” a password will be required to access the live page.
How to Customize Password-Protected Pages in WordPress
In this guide, we already talked about the basics of customizing password-protected pages in WordPress. There could be many ways to do that. If you want to learn advanced tactics, keep following up.
Customize Password Protected Pages with SeedProd
The drag-and-drop builder in SeedProd allows you to customize the built-in Coming Soon and Maintenance Mode pages. Without any coding knowledge, you may quickly change your complete WordPress site.
Additionally, it has access controls that enable it to restrict access to the pages that require a password. The pages you’re working on will only be visible to the user you want.
Using SeedProd is the simplest approach to customize a particular password-protected page. It is the best page builder and WordPress website builder.
We’ll use the SeedProd Pro edition for this guide because it has more customization options and premium themes.
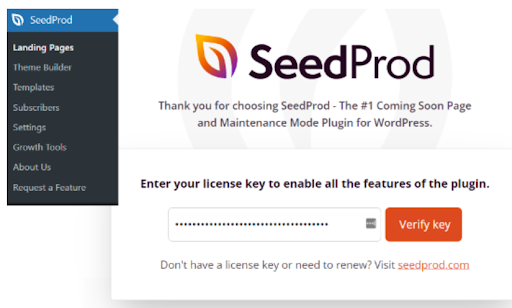
First, you need to install and activate the SeedProd plugin on the WordPress website. After activating the plugin, it will take you to the SeedProd welcome page in your WordPress dashboard.
After that, you must enter the license key and press the “Verify Key” button. The license key is located in the area of your SeedProd account.
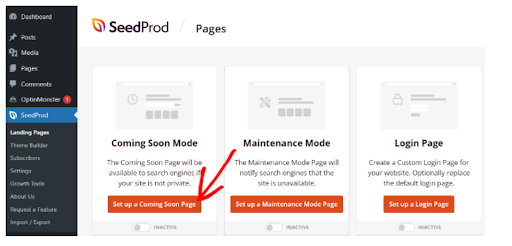
Next, go to SeedProd » Landing Pages from your WordPress Dashboard and create a brand-new personalized landing page with password protection.
We’ll demonstrate how to select which pages need to be password-protected later on in this article. You can password-protect every page on your website or just a few.
In this article, we’ll make a coming soon page for a password-protected website launch. Nevertheless, if you simply utilize it to password-protect some pages, you can easily change your design.
To start creating the coming soon page, Click on the ‘Set up a Coming Soon Page’ button.
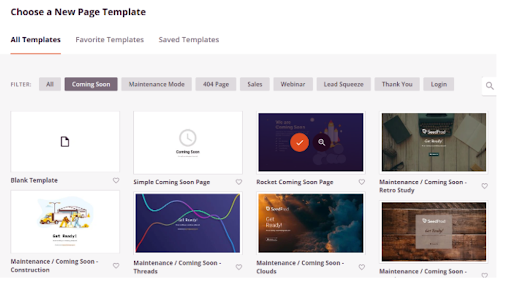
On the next page, you will see a different page template from the SeedProd plugin. To customize the page, simply hover the cursor over it and press the orange checkmark button.
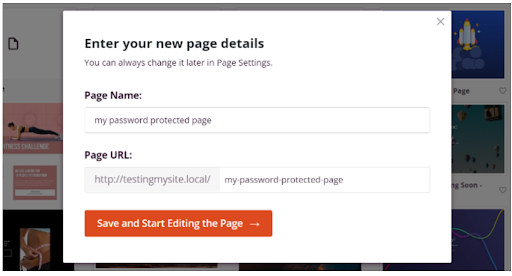
Once you select a template page, Seedprod will open a pop-up modal named “Enter your new page details.”
Put the page name and a mention of a specific part of the page which means the URL slug. Then Click on the ‘Save and Start Editing the Page’ button.
Here, we are going to customize a password-protected page and add different features like text, images, buttons, etc.
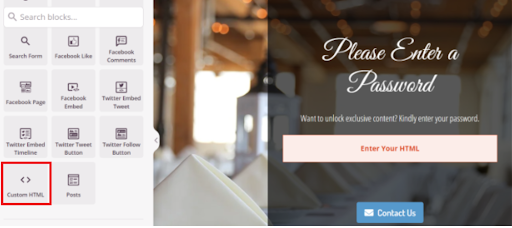
To add these elements, you can simply drag any block from the menu on the left and drop it into the template on the right. Then, you can easily customize the page by clicking on it.
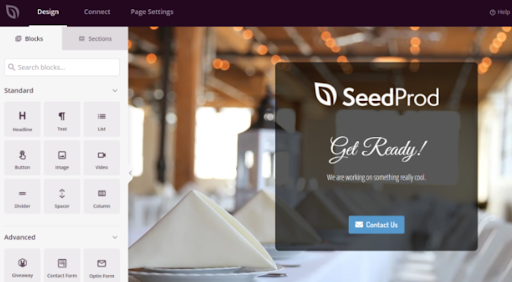
Let’s try to add something to the front end of the template. SeedProd has an amazing block of adding passwords so that you can protect the content.
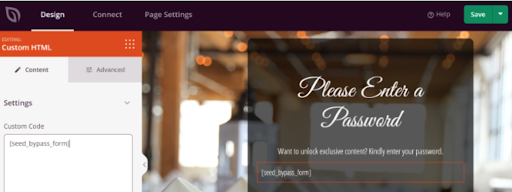
First, in the SeedProd builder, add a “Custom HTML” block by dragging and dropping it onto the template.
Next, in the ‘Custom Code’ section, put the [seed bypass form] shortcode. There you go!
As soon as you’re finished, don’t forget to hit the “Save” button.
Setting Password-Protection in SeedProd from different Specific Pages
Since we have already created the custom coming soon page using the [seed bypass form] shortcode. Now, we have to set up password protection on particular pages.
To get started, head to the “Page Settings” and hit on the “Access Control” option. Following that, you may add a password to your restricted content in the “Bypass URL” section.

Be aware that whatever you enter in the “Bypass URL” section will serve as both the password and a link. Both can access the page through the password and URL.
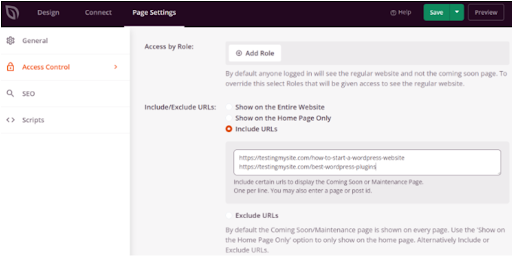
Using SeedProd, you can exclude specific URLs from your websites, such as admin, login, dashboard, and account. By doing this, site owners are protected from being locked out of their websites.
Now, you have to choose the URL that needs to be Password-Protected. Go to the ‘Access Control’ settings and scroll down to the ‘Include/Exclude URLs’ section. Then, choose the “Include URLs” option and enter the particular pages you want to restrict.
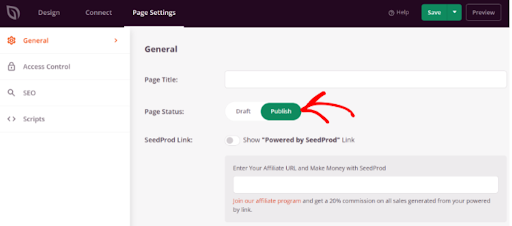
Once you are done, hit the “Save” button at the top. After that, go to the “General” option under the “Page Settings” and change the page status to “Publish”.
After closing the landing page builder, head to SeedProd>>Landing pages from your WordPress admin panel.
From here, switch on your password-protected website by clicking the toggle under “Coming Soon Mode.”
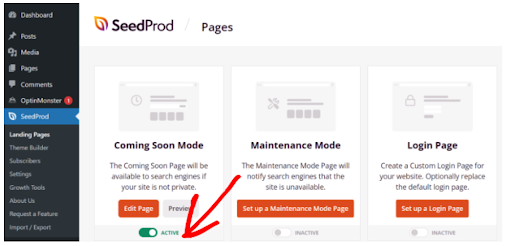
That’s it. You have done it successfully, a unique landing page with password protection that only appears on particular WordPress sites.
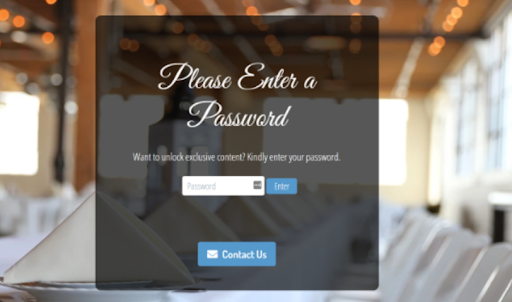
To see the customized password-protected page in action, just visit those pages on your website.
How to Customize Default Password Pages with CSS Hero
Let’s look around for another solution for customizing password-protected pages. The second option we have to customize password-protected sites is to use a visual editor plugin. This suggests you can update any page’s CSS without editing the code.
For that, we are using CSS Hero. It is one of the amazing and handy plugins for easily customizing a WordPress site by clicking and pointing. CSS Hero is one of the best tools for modifying the default page you want to restrict.
As a result, you can specify each section separately and change the look. Instead of using a password page like the one below.
To utilize this plugging, you have to install it and navigate to the password-protected page on the WordPress site. Click the Customize with CSS Hero link in the WordPress admin bar at the top of your page.
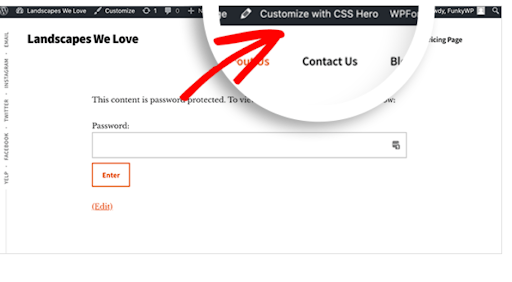
After clicking, the point-and-click visual editor will avail where you can edit and customize your WordPress page.

Click to bring up the settings box on the left-hand side and change the background color for the header section. Next, select a color using the color picker tool.
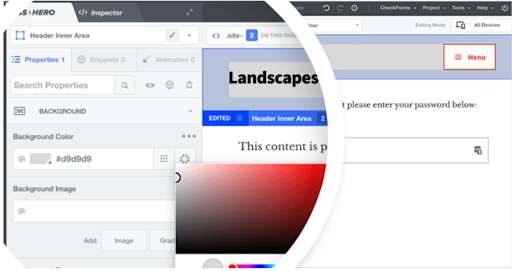
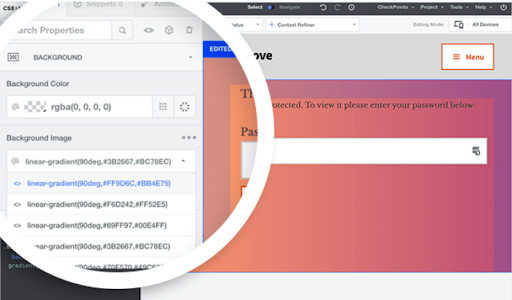
You can choose the background color or gradient from the list and add a background image as well.
When you are satisfied with your design, you can publish it by clicking the “Save and Publish” button. Next, click on the Quit icon in the top right corner of the screen.
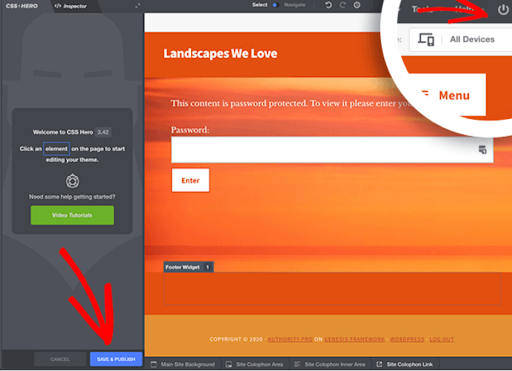
There you have the newly customized password-protected page with its unique design and password form.
Final Thoughts
We hope this guide has helped you to learn to customize a password-protected page. In this guide, we tried to bring out the best solutions for you. But there could be more solutions that are also effective. However, having a password-protected page can help you in terms of developing sites or creating a private page, etc.
You can customize amazing password-protected pages using the mentioned techniques without writing a single line of code. Hopefully, you have enjoyed our article.

